
Skateboarding is a popular recreational activity enjoyed by people of all ages. However, the traditional skateboard has undergone significant technological advancements in recent years, with the advent of electric skateboards. An electric skateboard is essentially a traditional skateboard equipped with an electric motor that allows the rider to move without pushing. In this article, we will discuss how to make an electric skateboard from scratch using a DIY electric skateboard kit, electric skateboard kit, DIY electric skateboard motor, and electric skateboard parts.
Understanding Electric Skateboard Components
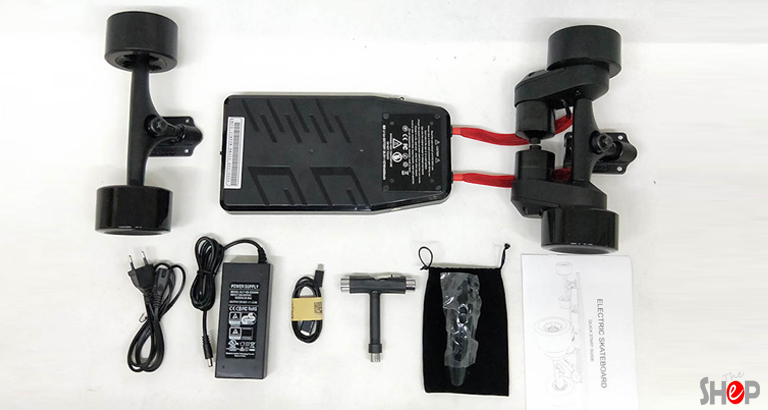
Before delving into the process of making an electric skateboard, it is essential to understand the basic components that make up an electric skateboard. These include:
Deck: The deck is the wooden platform that the rider stands on.
Trucks: These are the metal components that attach the wheels to the deck and allow for turning.
Wheels: The wheels are what enable the skateboard to move.
Motor: The motor is the electric component that propels the skateboard.
Battery: The battery is the power source that provides energy to the motor.
Speed controller: The speed controller is a device that regulates the speed of the motor.
Remote control: The remote control is used to control the speed and direction of the skateboard.
Choosing the Right Electric Skateboard Kit
When it comes to making an electric skateboard, the first step is to choose the right electric skateboard kit. DIY electric skateboard kits come with all the necessary components required to build an electric skateboard, including the motor, battery, speed controller, and remote control. However, not all kits are created equal, so it is essential to choose the right kit for your needs.
Some factors to consider when choosing an electric skateboard kit include the power output of the motor, the battery life, the top speed of the skateboard, and the weight of the components. It is also important to consider the quality of the components, as cheaper kits may have lower quality parts that may wear out quickly.
Assembling the Electric Skateboard
Once you have chosen the right electric skateboard kit, it is time to start assembling the skateboard. Here are the steps to follow:
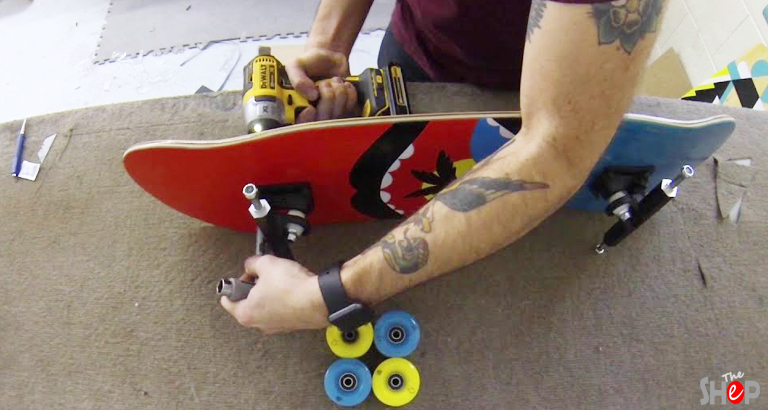
Step 1: Install the Trucks and Wheels
The first step is to attach the trucks to the deck. To do this, place the trucks in the desired position on the underside of the deck and secure them with screws. Once the trucks are securely attached, attach the wheels to the trucks.
Step 2: Install the Motor
The next step is to install the motor. Most DIY electric skateboard kits come with a motor mount that can be attached to the trucks. Attach the motor to the mount and secure it in place with screws.
Step 3: Install the Battery
The battery is typically installed underneath the deck, so it is out of the way while riding. Most kits come with a battery enclosure that can be attached to the underside of the deck. Attach the battery to the enclosure and secure it in place with screws.
Step 4: Install the Speed Controller
The speed controller regulates the speed of the motor, so it is a crucial component of the electric skateboard. Most kits come with a speed controller that can be installed near the motor. Connect the speed controller to the motor and battery according to the manufacturer’s instructions.
Step 5: Install the Remote Control
The remote control is used to control the speed and direction of the skateboard. Most kits come with a remote control that can be synced with the speed controller. Follow the manufacturer’s instructions to sync the remote control with the speed controller.
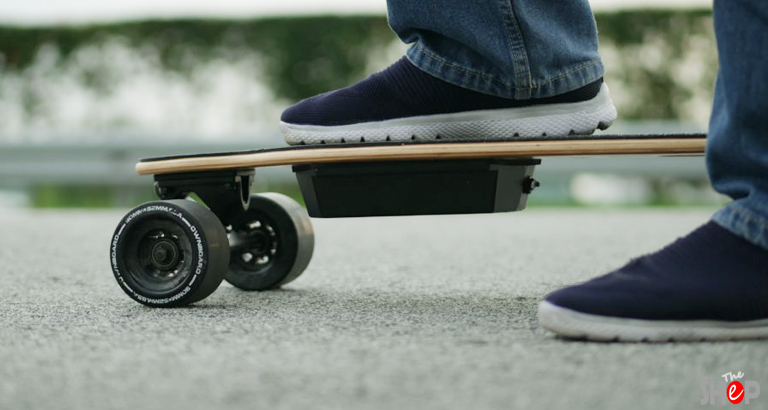
Step 6: Test the Electric Skateboard
Once all the components are installed, it is time to test the electric skateboard. Turn on the remote control and ensure that it is connected to the speed controller. Turn on the speed controller and test the motor to ensure that.
Conclusion
In conclusion, making an electric skateboard is a fun and rewarding project that can be accomplished with the right tools and components. Choosing the right electric skateboard kit is essential, as it will determine the quality and performance of the skateboard. By following the steps outlined in this article, you can easily assemble an electric skateboard from scratch using a DIY electric skateboard kit, electric skateboard kit, DIY electric skateboard motor, and electric skateboard parts. With your new electric skateboard, you can enjoy a whole new level of speed and excitement while skateboarding. However, it is important to prioritize safety and wear protective gear such as a helmet, knee pads, and elbow pads while riding.
Frequently Asked Questions (FAQS)
- Is it difficult to make an electric skateboard?
Making an electric skateboard from scratch can be a challenging project, especially if you don’t have experience with electrical wiring and assembly. However, with the right tools, components, and instructions, it is possible for anyone to build an electric skateboard.
- How much does it cost to make an electric skateboard?
The cost of making an electric skateboard depends on the quality and type of components you use. A basic DIY electric skateboard kit can cost anywhere from $200 to $500, while more advanced kits can cost up to $1,000 or more. Additionally, the cost of the deck, trucks, and wheels can vary depending on the brand and quality.
- How fast can an electric skateboard go?
The top speed of an electric skateboard depends on the power output of the motor and the weight of the rider. Most electric skateboards can reach speeds of up to 20 to 25 miles per hour, while some high-performance models can go as fast as 35 miles per hour or more. It is important to follow local laws and regulations regarding the use of electric skateboards on public roads and sidewalks.
Arnold A. Jones: Your go-to source for electric scooters, hoverboards, and skateboards! Riding enthusiast and expert sharing tips, trends, and insights for riders of all levels. Stay in the know with Arnold’s expertise.


")
")
Leave a Reply